Schritt-für-Schritt-Anleitung
1. Arduino Software download
https://www.arduino.cc/en/software
2. Anpassung der „User_Setup.h“
Bearbeite die User_Setup.h der TFT_eSPI-Bibliothek, um die Pin-Konfiguration deines Displays festzulegen:
Die TFT_eSPI-Library kann man einer ganzen Reihe von Displays umgehen und darum muss ihr irgendwie mitgeteilt werden, welches Display-Modell wir vorliegen haben und wie die Library es ansprechen soll. Statt jedesmal alles mit #define-Statements an den Anfang der main.cpp zu schreiben, hat Bodmer hier den Weg der User_Setup.h gewählt, in denen alle Einstellungen getroffen werden.
Die User_Setup.h ist unterhalb des Projekts in \libraries\TFT_eSPI bzw. im absoluten Pfasd D:\Users\admin\Documents\Arduino\libraries\TFT_eSPI zu finden und am besten ziehen wir sie in den Editor, um einen Tab „User_Setup.h“ oberhalb zu bekommen und komfortabel editieren zu können.
Für unser ESP32-2432S028R brauchen wie folgende Einstellungen:
#define USER_SETUP_INFO "User_Setup"

// Section 1. Call up the right driver file and any options for it

#define ILI9341_2_DRIVER     // ESP2432S028R funktioniert mit v1, v2 und v3
//#define ST7789_DRIVER      // ESP2432S028R alternativ nur für v3, nicht für v1, sonst bleibt Display weiß

#define TFT_WIDTH  240 // ST7789 240 x 240 and 240 x 320
#define TFT_HEIGHT 320 // ST7789 240 x 320
#define TFT_INVERSION_ON  // nur für ESP2432S028R v3, sonst sind die Farben invers

// Section 2. Define the pins that are used to interface with the display here

// ESP32-2432S028R v1 - v3
#define TFT_MISO  12
#define TFT_MOSI  13
#define TFT_SCLK  14

#define TFT_CS    15
#define TFT_DC    2
#define TFT_RST   -1

#define TFT_BL    21
#define TFT_BACKLIGHT_ON HIGH  // Level to turn ON back-light (HIGH or LOW)

#define TOUCH_CS  33     // Chip select pin (T_CS) of touch screen

// Section 3. Define the fonts that are to be used here

#define LOAD_GLCD   // Font 1. Original Adafruit 8 pixel font needs ~1820 bytes in FLASH
#define LOAD_FONT2  // Font 2. Small 16 pixel high font, needs ~3534 bytes in FLASH, 96 characters
#define LOAD_FONT4  // Font 4. Medium 26 pixel high font, needs ~5848 bytes in FLASH, 96 characters
#define LOAD_FONT6  // Font 6. Large 48 pixel font, needs ~2666 bytes in FLASH, only characters 1234567890:-.apm
#define LOAD_FONT7  // Font 7. 7 segment 48 pixel font, needs ~2438 bytes in FLASH, only characters 1234567890:-.
#define LOAD_FONT8  // Font 8. Large 75 pixel font needs ~3256 bytes in FLASH, only characters 1234567890:-.
//#define LOAD_FONT8N // Font 8. Alternative to Font 8 above, slightly narrower, so 3 digits fit a 160 pixel TFT
#define LOAD_GFXFF  // FreeFonts. Include access to the 48 Adafruit_GFX free fonts FF1 to FF48 and custom fonts

#define SMOOTH_FONT

// Section 4. Other options

#define SPI_FREQUENCY  27000000 // evtl. gehen auch 40000000
#define SPI_READ_FREQUENCY  20000000 // Optional reduced SPI frequency for reading TFT
#define SPI_TOUCH_FREQUENCY  2500000 // The XPT2046 requires a lower SPI clock rate of 2.5MHz so we define that here
Hier nochmal die Pinbelegung für unser ESP32-2432S028
| SPI Pin | GPIO |
| MISO (TFT_MISO) | GPIO 12 |
| MOSI (TFT_MOSI) | GPIO 13 |
| SCKL (TFT_SCLK) | GPIO 14 |
| CS (TFT_CS) | GPIO 15 |
| DC (TFT_DC) | GPIO 2 |
| RST (TFT_RST) | GPO -1 |
| Backlight Pin | GPIO 21 |
3. API für Bitcoin-Kurs
Wir verwenden die CoinDesk API (https://api.coindesk.com/v1/bpi/currentprice/BTC.json), um den aktuellen Bitcoin-Kurs abzurufen.
4. Arduino-Bibliotheken
Installiere die folgenden Bibliotheken in der Arduino IDE:
- TFT_eSPI: Für die Display-Steuerung.
- ArduinoJSON: Zum Verarbeiten der JSON-Daten.
- WiFi: Für die WLAN-Verbindung.
- HTTPClient: Für die API-Anfragen.
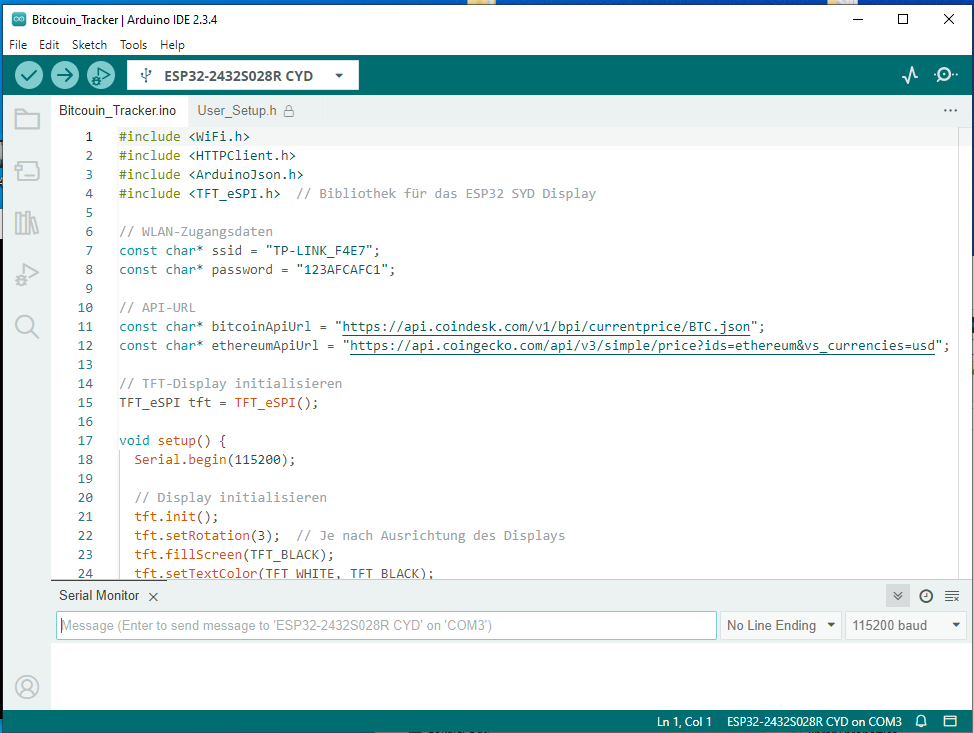
5. Beispielcode

Folgenden Code einfach in eure Arduino Projektierungsumgebung einbinden.
#include <WiFi.h>
#include <HTTPClient.h>
#include <ArduinoJson.h>
#include <TFT_eSPI.h>  // Bibliothek für das ESP32 SYD Display

// WLAN-Zugangsdaten
const char* ssid = "TP-LINK_F4E7";
const char* password = "123AFCAFC1";

// API-URL
const char* bitcoinApiUrl = "https://api.coindesk.com/v1/bpi/currentprice/BTC.json";

// TFT-Display initialisieren
TFT_eSPI tft = TFT_eSPI();

void setup() {
  Serial.begin(115200);

  // Display initialisieren
  tft.init();
  tft.setRotation(2);  // Je nach Ausrichtung des Displays
  tft.fillScreen(TFT_BLACK);
  tft.setTextColor(TFT_WHITE, TFT_BLACK);
  tft.setTextSize(4);

  // WLAN verbinden
  tft.setCursor(0, 0);
  tft.println("Verbinde mit WLAN...");
  WiFi.begin(ssid, password);
  while (WiFi.status() != WL_CONNECTED) {
    delay(1000);
    Serial.println("WLAN-Verbindung wird hergestellt...");
    tft.print(".");
  }
  tft.println("\nWLAN verbunden!");
}

void loop() {
  if (WiFi.status() == WL_CONNECTED) {
    HTTPClient http;
    http.begin(bitcoinApiUrl);
    int httpResponseCode = http.GET();

    if (httpResponseCode == 200) {  // Erfolgreiche Anfrage
      String payload = http.getString();
      Serial.println(payload);

      // JSON-Daten parsen
      DynamicJsonDocument doc(2048);
      DeserializationError error = deserializeJson(doc, payload);

      if (!error) {
        // Bitcoin-Kurs in USD abrufen
        float bitcoinPrice = doc["bpi"]["USD"]["rate_float"];
        Serial.println("Bitcoin-Kurs in USD: " + String(bitcoinPrice));

        // Kurs auf dem Display anzeigen
        tft.fillScreen(TFT_BLACK);
        tft.setCursor(100, 20);
        tft.println("BTC/USD:");
        tft.setTextSize(4);
        tft.println(String(bitcoinPrice, 2));
      } else {
        Serial.println("JSON-Parsing-Fehler");
      }
    } else {
      Serial.println("HTTP-Fehler: " + String(httpResponseCode));
    }
    http.end();
  } else {
    Serial.println("WLAN getrennt!");
  }

  delay(60000);  // Aktualisierung alle 60 Sekunden
}
6. Fehlerbehebung bei API-Zugriff
Falls du eine Fehlermeldung wie „Certificate error“ erhältst, liegt dies am SSL-Zertifikat der API. Du kannst stattdessen die unverschlüsselte Version der API verwenden:
cppCode kopierenconst char* bitcoinApiUrl = "http://api.coindesk.com/v1/bpi/currentprice/BTC.json";
Optionale Erweiterungen
- Kurs in Euro anzeigen:
- Tausche
USDgegenEUR:cppCode kopierenfloat bitcoinPrice = doc["bpi"]["EUR"]["rate_float"];
- Tausche
- Graphischer Verlauf:
- Speichere historische Kurswerte in einem Array und zeichne mit
tft.drawLine()odertft.drawPixel()einen Graphen.
- Speichere historische Kurswerte in einem Array und zeichne mit
- Weitere Daten abrufen:
- Die API bietet neben dem Kurs auch Währungen, Datum und Zeit:cppCode kopieren
String timeUpdated = doc["time"]["updated"]; String currency = doc["bpi"]["USD"]["description"];
- Die API bietet neben dem Kurs auch Währungen, Datum und Zeit:cppCode kopieren
- MQTT-Integration:
- Übertrage den Kurs an ein MQTT-Dashboard.
Zusammenfassung
Der Code verbindet den ESP32 mit deinem WLAN, ruft den Bitcoin-Kurs von der API ab, verarbeitet die JSON-Daten und zeigt sie auf dem 2,8-Zoll-TFT-Display an. Passen Sie die Pin-Konfiguration und API-URL an deine spezifische Hardware an.
